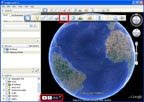
First, make sure you have Google Earth 5.0 up and running. Earlier versions don't support making tours. Next,
- Review the Tour-Making Tutorial from Google Earth. This should give you all you need to know. Read closely, however, how to add sound tracks and include tours within tours.
- Once you have your tour named, saved, and in a particular folder on your computer, you may send it to a friend as an email attachment. Click on the attachment, and Google Earth should launch and open your tour. It's as easy as that!
- If you don't want to send an attachment (some can get pretty big), you can serve it from a website. If you don't have a server check out Google Sites. Create your own site for free. Upload your *.kmz file to your site.
- Note the URL of the saved *.kmz file on your server. Send the URL to a friend in an email. Now that friend can click on the file, be prompted to save it on his computer. When this done, you can double click on it, launching Google Earth which will play your tour. Alternatively, you can open Google Earth and then open that file, playing the tour. It is as simple as that.
- One tip: place overlays, tracks, old maps -- anything that is enabled on your "Places" menu --close together -- in one folder. Google Earth doesn't do this automatically. Here is what Frank Taylor wrote to me when I could not see the 1842 map: You have to put the GPS track (and any other KML content) in the file along with the Tour placemark (I recommend putting it in a folder). If the content is not present in the file it can't load or show the content.
For example:
[] My Places
>[] My Tour File
>>[] Folder for content
>>>* My GPS Track
>>>* Placemark 1(2,3)
>>*My Tour

No comments:
Post a Comment